
Two ways to use Audhive
Cloud subscription
We operate your own instance (e.g. yourcompany.audhive.io). Nothing to install: after ordering you receive a set-up link by e-mail. How it works
Self-hosted (on-premises)
Audhive runs on your web server. A wizard in the browser guides you through the installation; the licence is activated online. Installation
System requirements (self-hosted)
The setup wizard lists these prerequisites on its first page. For the cloud subscription you only need a current browser.
| Component | Requirement |
|---|---|
| Web server | Reachable over HTTPS (required for passkeys and Microsoft Entra ID). Apache 2.4 with mod_rewrite and mod_headers; the supplied .htaccess files must be active (they protect e.g. .env and the upload folders). |
| PHP | 8.1 or newer, recommended 8.5. Extensions checked by the setup: pdo_mysql, curl, openssl, json, mbstring. Also used by Audhive: zip (installing updates), fileinfo (checking uploads) and gd (images). |
| Database | MariaDB 10.4+ or MySQL 8.0+. An empty database with its own user having CREATE, ALTER, INSERT, UPDATE, DELETE and SELECT privileges on it. |
| Files and storage | The setup/ folder must be writable during the installation (the wizard writes the .env file with the database access). Evidence, documents and logos are stored in the file system of the installation – plan the space according to your evidence volume. The installation package is about 15 MB. For restoring large backups, upload_max_filesize and post_max_size in php.ini must be large enough. |
| Network | Outgoing HTTPS to license.it-sb.ch (licence activation and verification every 7 days) and updates.it-sb.ch (updates). Optional: Microsoft (Entra ID sign-in, mail via Microsoft Graph), an SMTP server, and Anthropic or OpenAI for the AI features. |
| Scheduled jobs | Cron (or the scheduler of your hosting panel) for the daily update check (cron_update_check.php) and, if desired, scheduled backups and e-mail reminders. Audhive sets up the jobs itself where the hosting allows it, otherwise it shows the command to enter. |
| Licence | Licence key from your order e-mail (format XXXXX-XXXXX-XXXXX-XXXXX-XXXXX). It is checked first in the setup. |
Installation step by step
The installation takes place in the browser. The pictures show the setup wizard of Audhive 2.6.9 with a fictitious licence (“Muster AG”).
Preparation
- Buy a licence: choose a package under Pricing and pay online. The licence key and the download link arrive by e-mail; the link checks your key and can be used again as long as the licence is valid.
- Prepare the server: web server with HTTPS and PHP, an empty database with its own user (see requirements).
- Unpack: extract the ZIP into the web folder of your (sub)domain.
- Start the setup: open
https://your-address/setup/setup.phpin the browser.
Setup wizard
-
Welcome: prerequisites, setup token, licence agreement
Choose the language at the top right (EN/DE). The page lists the prerequisites. To continue, the wizard needs a one-time setup token: it has generated it and saved it in the file
setup/.setup_token.phpon your server – open it via SSH, FTP or the file manager of your hosting and paste the value. This way nobody else can take over the installation. Read and accept the end user licence agreement, then click “Start Setup”.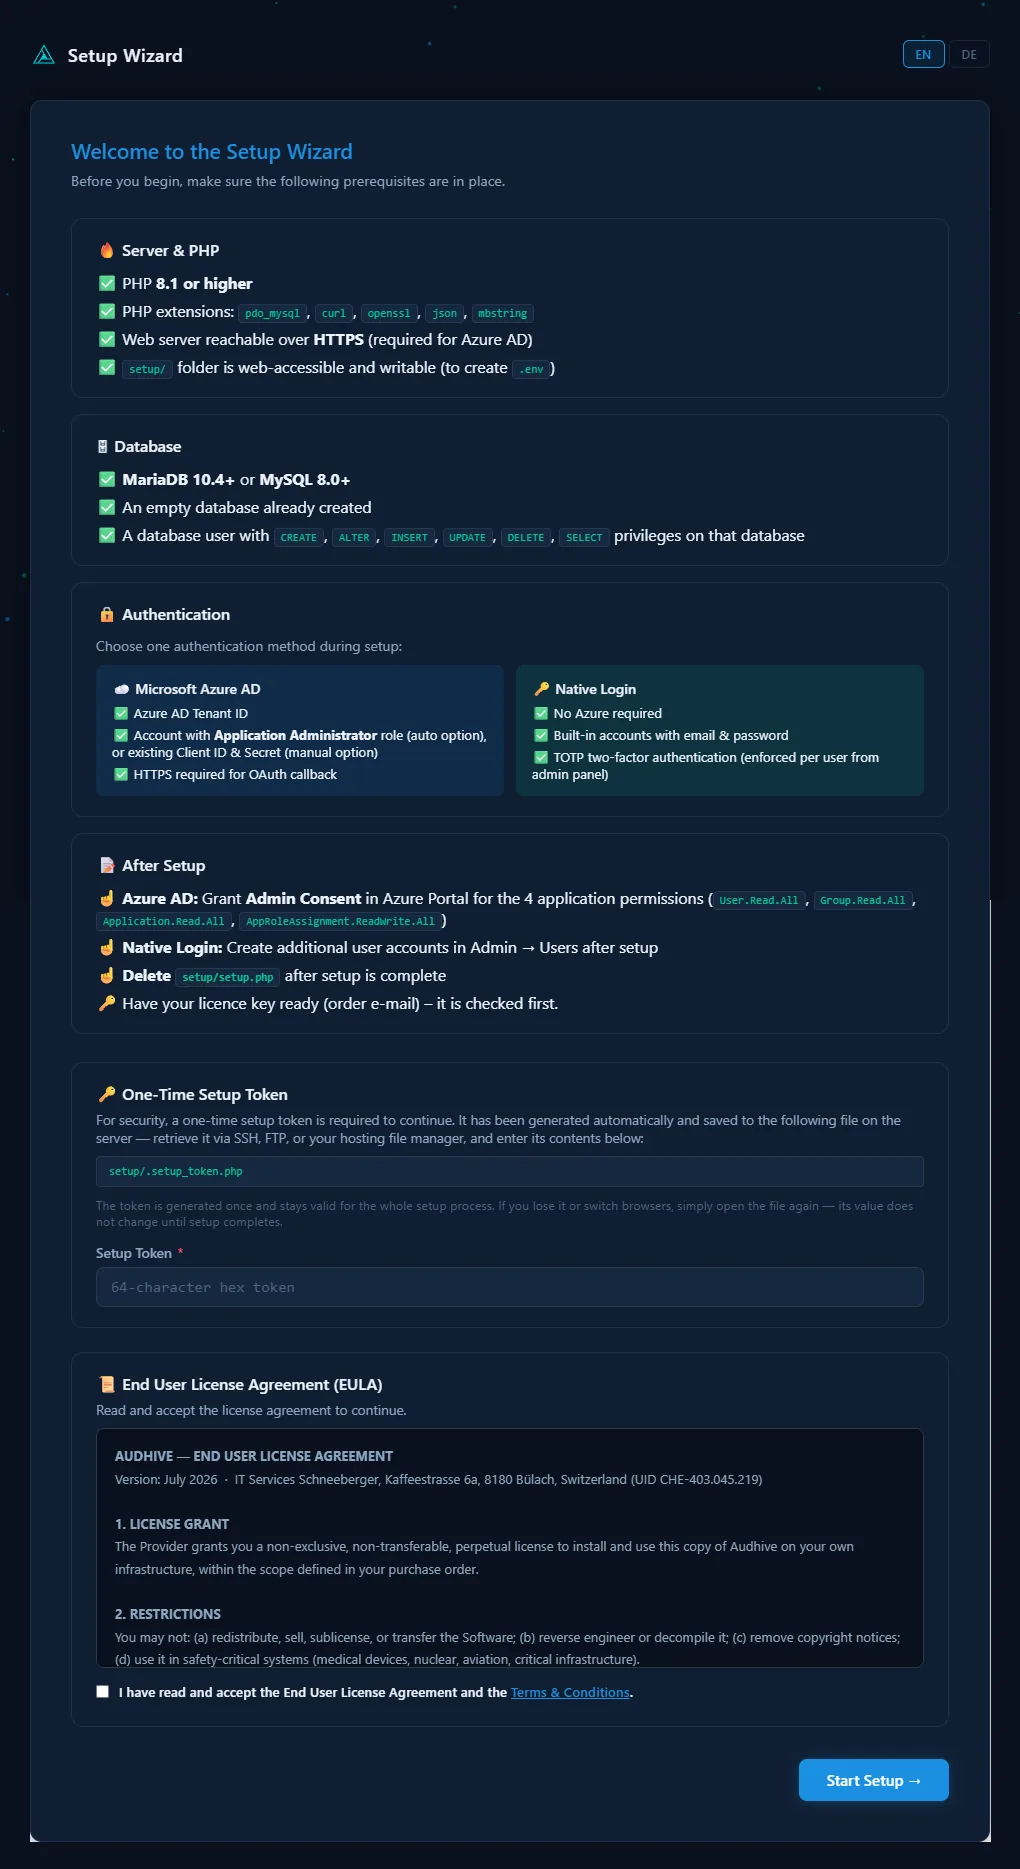
-
Licence key
Enter the key from your order e-mail and click “Check licence”. Audhive checks it with the IT SB licence server, activates it for this installation and sets the mode (SEC, ICS or FULL) automatically – you do not choose anything. Older offline licence keys (
eyJ…) are still accepted. If the setup was interrupted after the check, the wizard offers “Continue with this licence” without activating it again.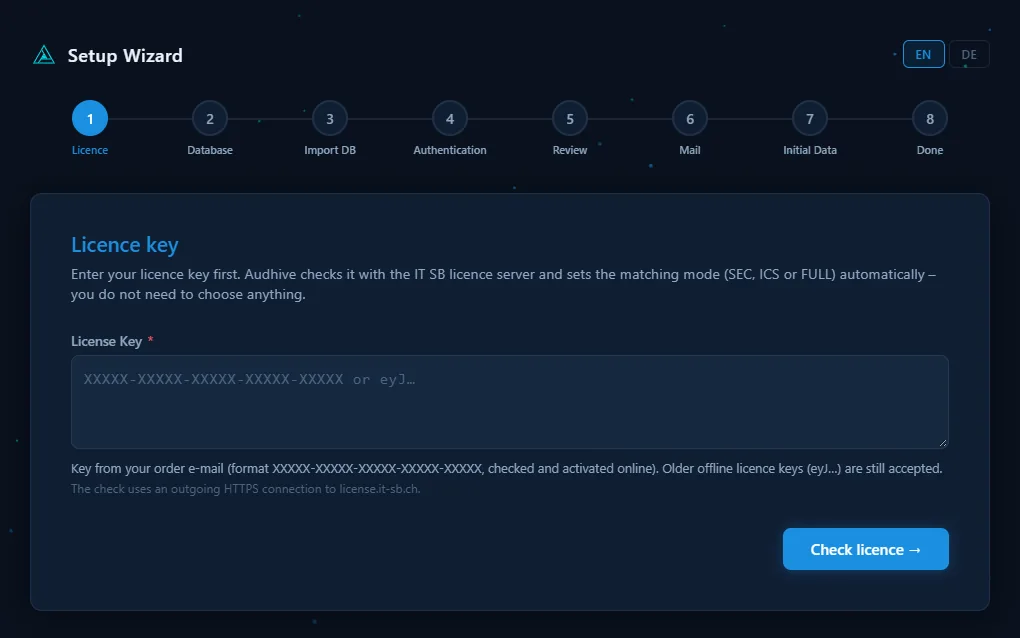
-
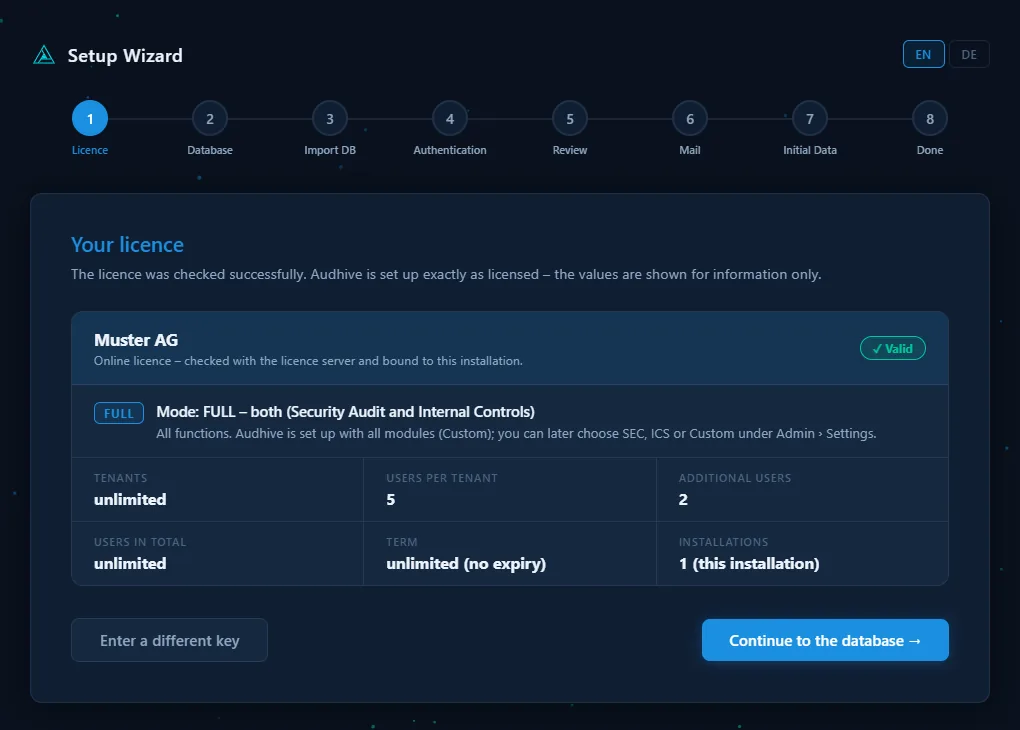
Your licence
The overview shows what is licensed: licensee, mode with a short explanation, tenants, users per tenant, additional users, users in total, term and installations (1 – this installation). The values are for information only; Audhive is set up exactly as licensed. Wrong key? “Enter a different key”. Otherwise “Continue to the database”.
-
Database
Host, database name, user name and password of the empty database. “Test & Continue” checks the connection and writes the
.envfile.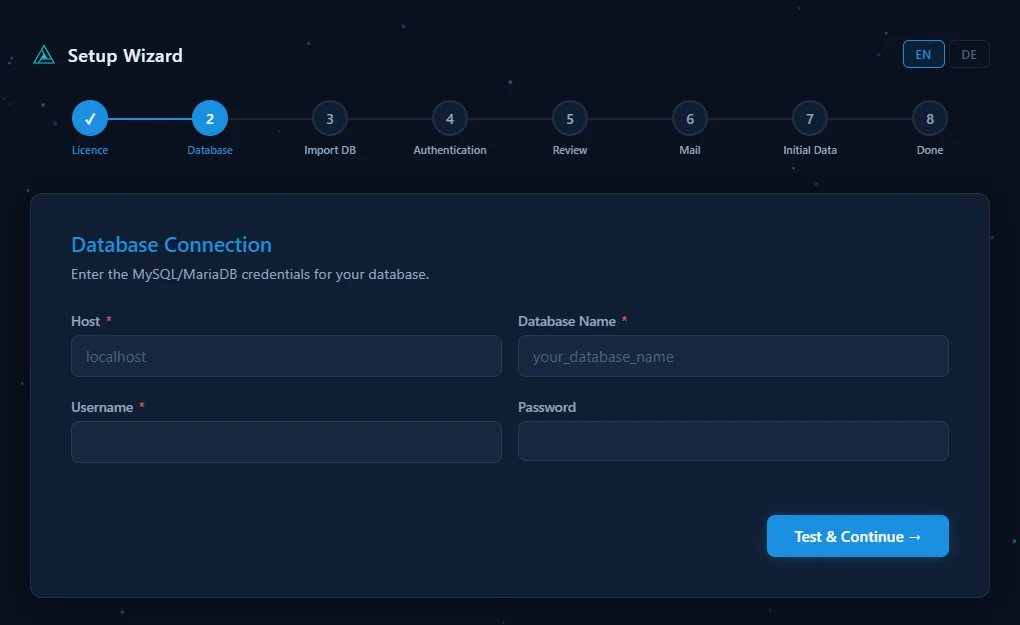
-
Import DB
Fresh install creates all tables (existing tables are deleted first – use it only on an empty database). Restore backup takes a full backup made by Audhive (
.sql), checks it for completeness, replaces the database contents and updates the schema if needed. The box shows the mode according to your licence; when restoring, SEC/ICS stay fixed and FULL keeps the mode of the backup. Then “Run Setup”.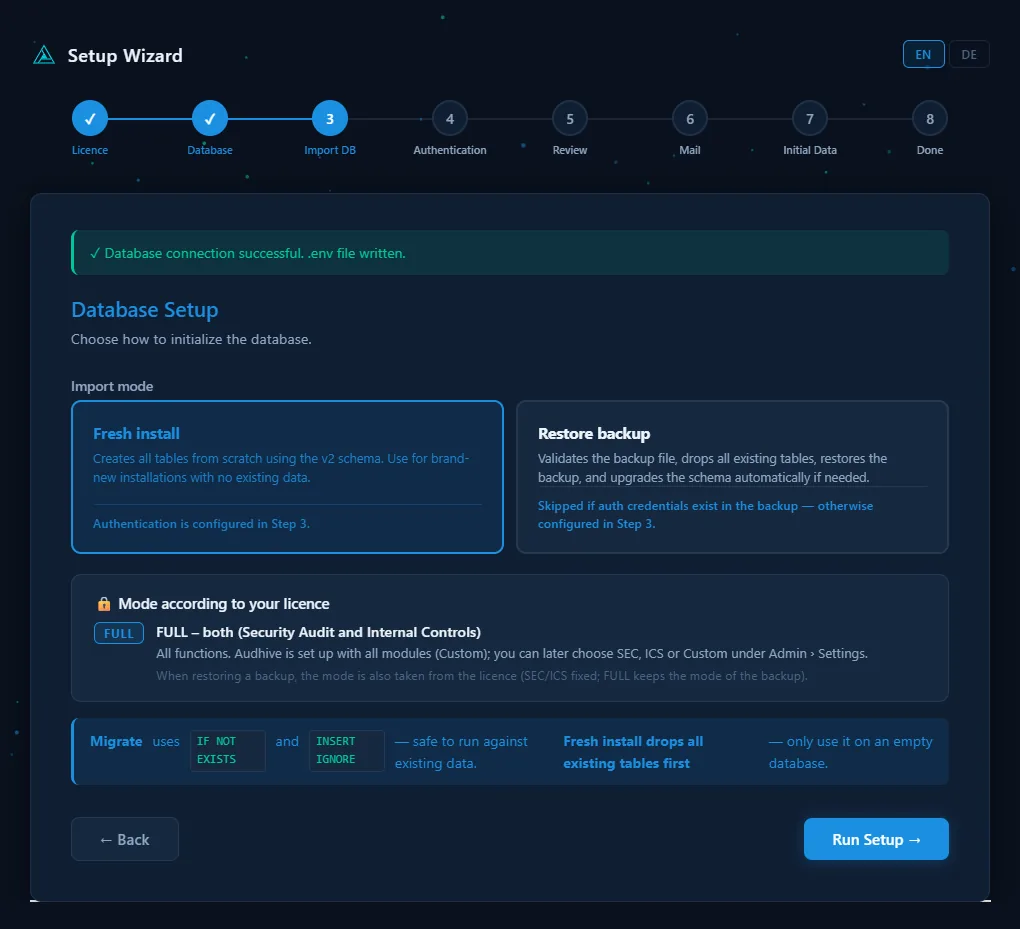
-
Authentication
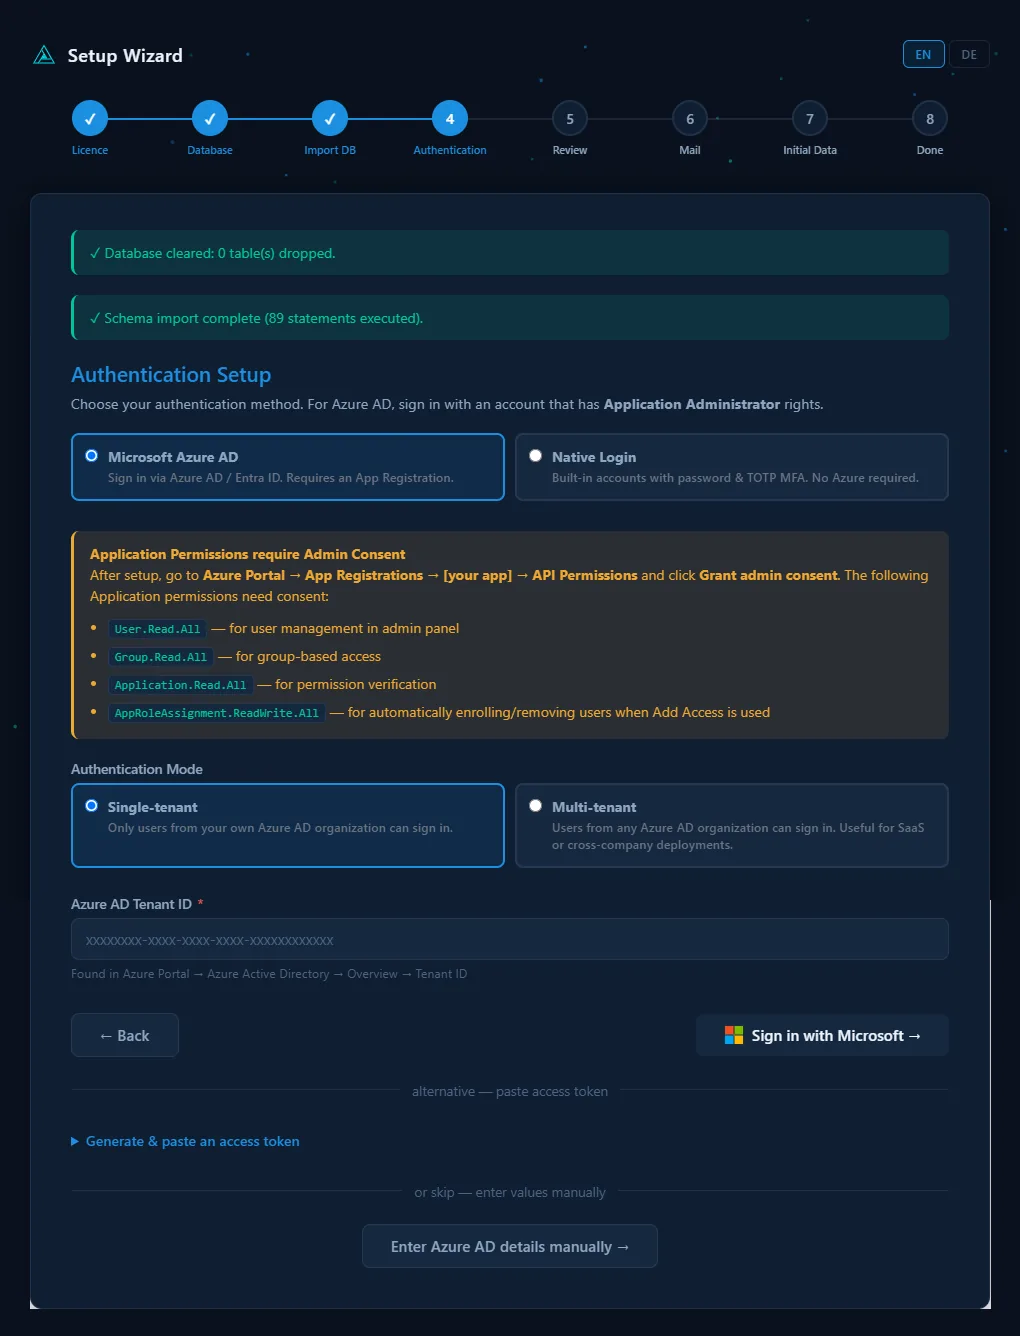
Choose how users sign in:
- Microsoft Entra ID (Azure AD): enter the tenant ID and choose single- or multi-tenant. “Sign in with Microsoft” creates the app registration automatically (account with the Application Administrator role); alternatively enter client ID and secret manually.
- Native sign-in: Audhive's own accounts. Enter the e-mail address and password of the first administrator; the second factor (TOTP) is enforced per user in the admin area.
-
Review
With Entra ID, the wizard shows the values of the app registration – check them and save. After restoring a backup it shows a summary of the restore. With native sign-in there is nothing to check; the wizard continues directly.
-
Mail
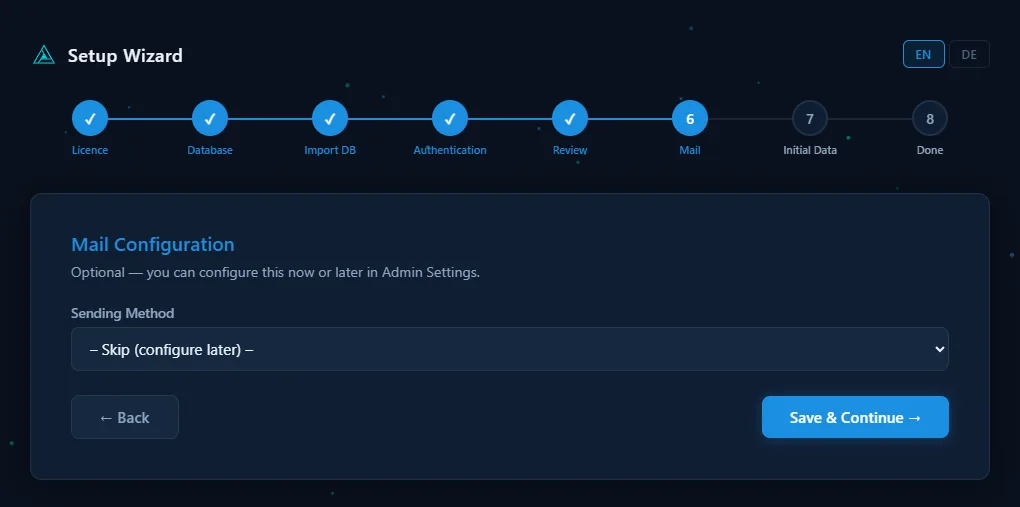
Optional: sending method SMTP (e.g. Office 365 smart host, port 587) or Microsoft Graph API, with sender address and name. You can also skip this and set it up later in the admin settings.
-
Initial data
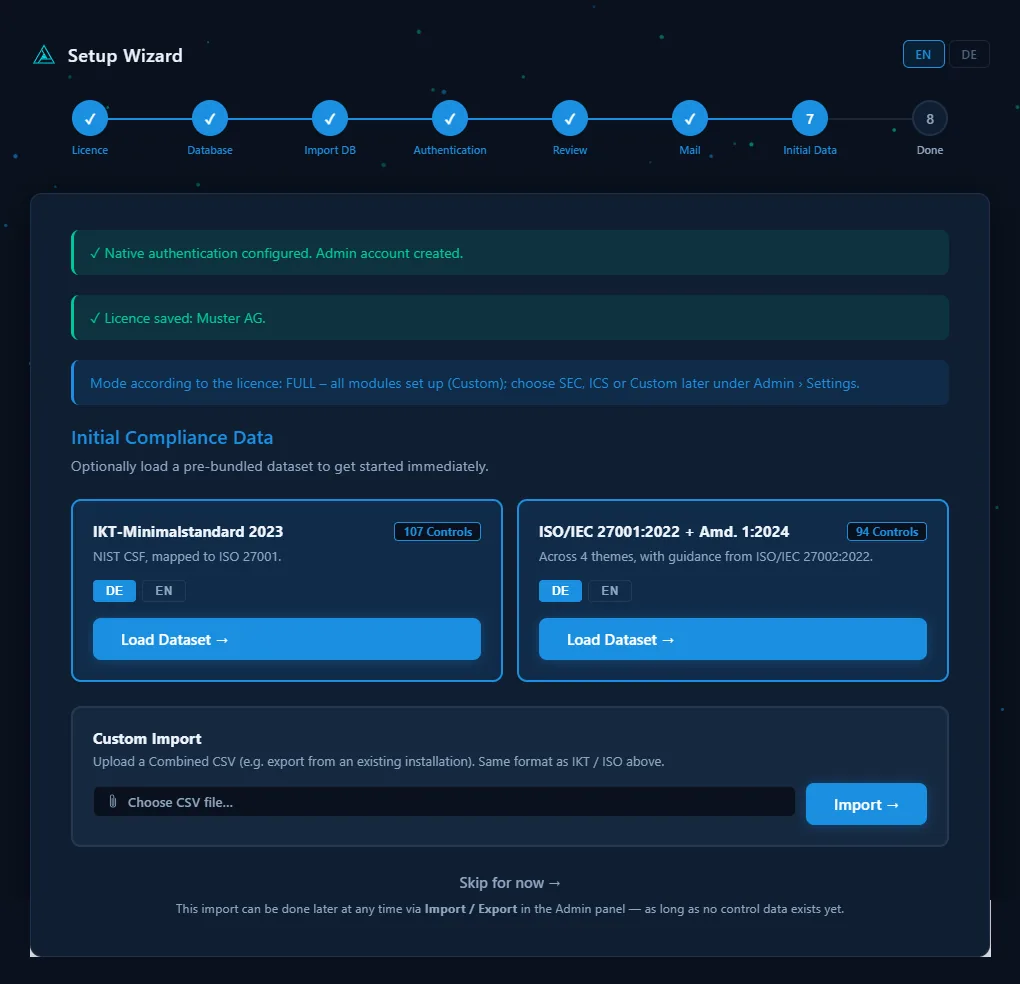
Load a supplied control catalogue to start right away – IKT minimum standard 2023 or ISO/IEC 27001:2022 + Amd. 1:2024, each in German or English – or import your own catalogue as a combined CSV (same format). You can skip this step; the import is also available later under Admin › Import / Export as long as no control data exists.
-
Done
The application is configured. Delete or protect
setup/setup.phpimmediately, then “Go to Application” and sign in with the administrator account.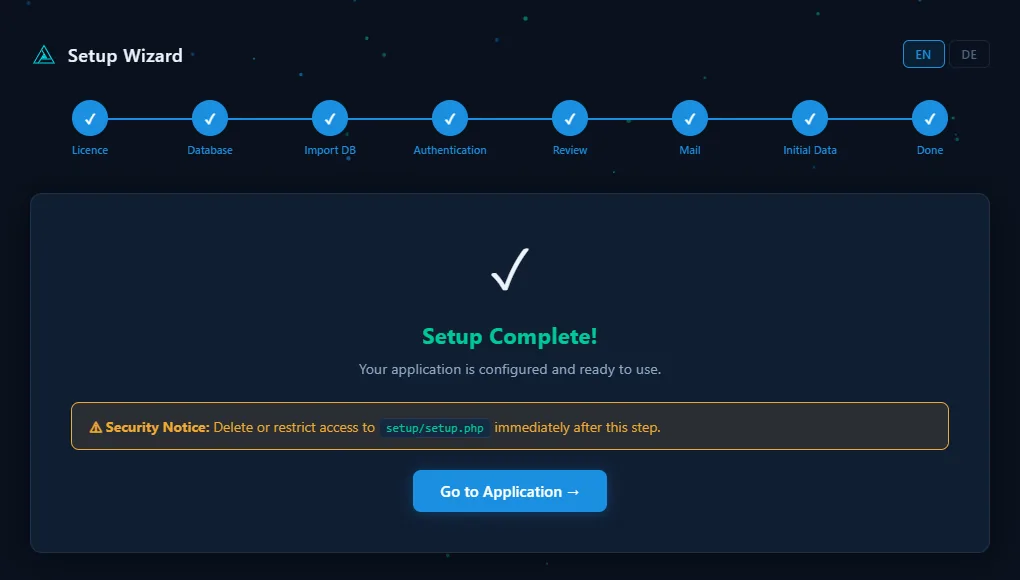
Messages when checking the licence
| Message | What to do |
|---|---|
| Not a valid licence key | Check the input: expected is XXXXX-XXXXX-XXXXX-XXXXX-XXXXX from the order e-mail (or an older offline key eyJ…). |
| Licence key unknown | Copy the key again from the order e-mail; if it still fails, contact us. |
| Licence expired | Renew the licence or buy a new package. |
| Already active in another installation | The licence is valid for one installation. In the previous installation choose Admin › Settings › License › “Release licence (move)”, then check the key here again – or contact us. |
| Licence server not reachable | Allow outgoing HTTPS from this server to license.it-sb.ch (firewall, proxy) and try again. |
After the setup
- Delete
setup/setup.php(or protect the folder) if you have not done so yet. - Entra ID: grant admin consent in the Azure portal for the application permissions
User.Read.All,Group.Read.All,Application.Read.AllandAppRoleAssignment.ReadWrite.All. - Native sign-in: create further accounts under Admin › Users & Permissions; the second factor (TOTP) is enforced per user.
- Daily update check: Admin › Update › “Set up daily check”. If your hosting does not accept jobs from PHP, Audhive shows schedule and command to enter in the hosting panel.
- Backups: set up a scheduled backup under Admin › Backup and include the server in your own backup.
- AI (optional): enter your own API key under Admin › Settings › AI.
First steps in Audhive
The same in the cloud and self-hosted. The pictures show the demo instance with fictitious companies and data.
-
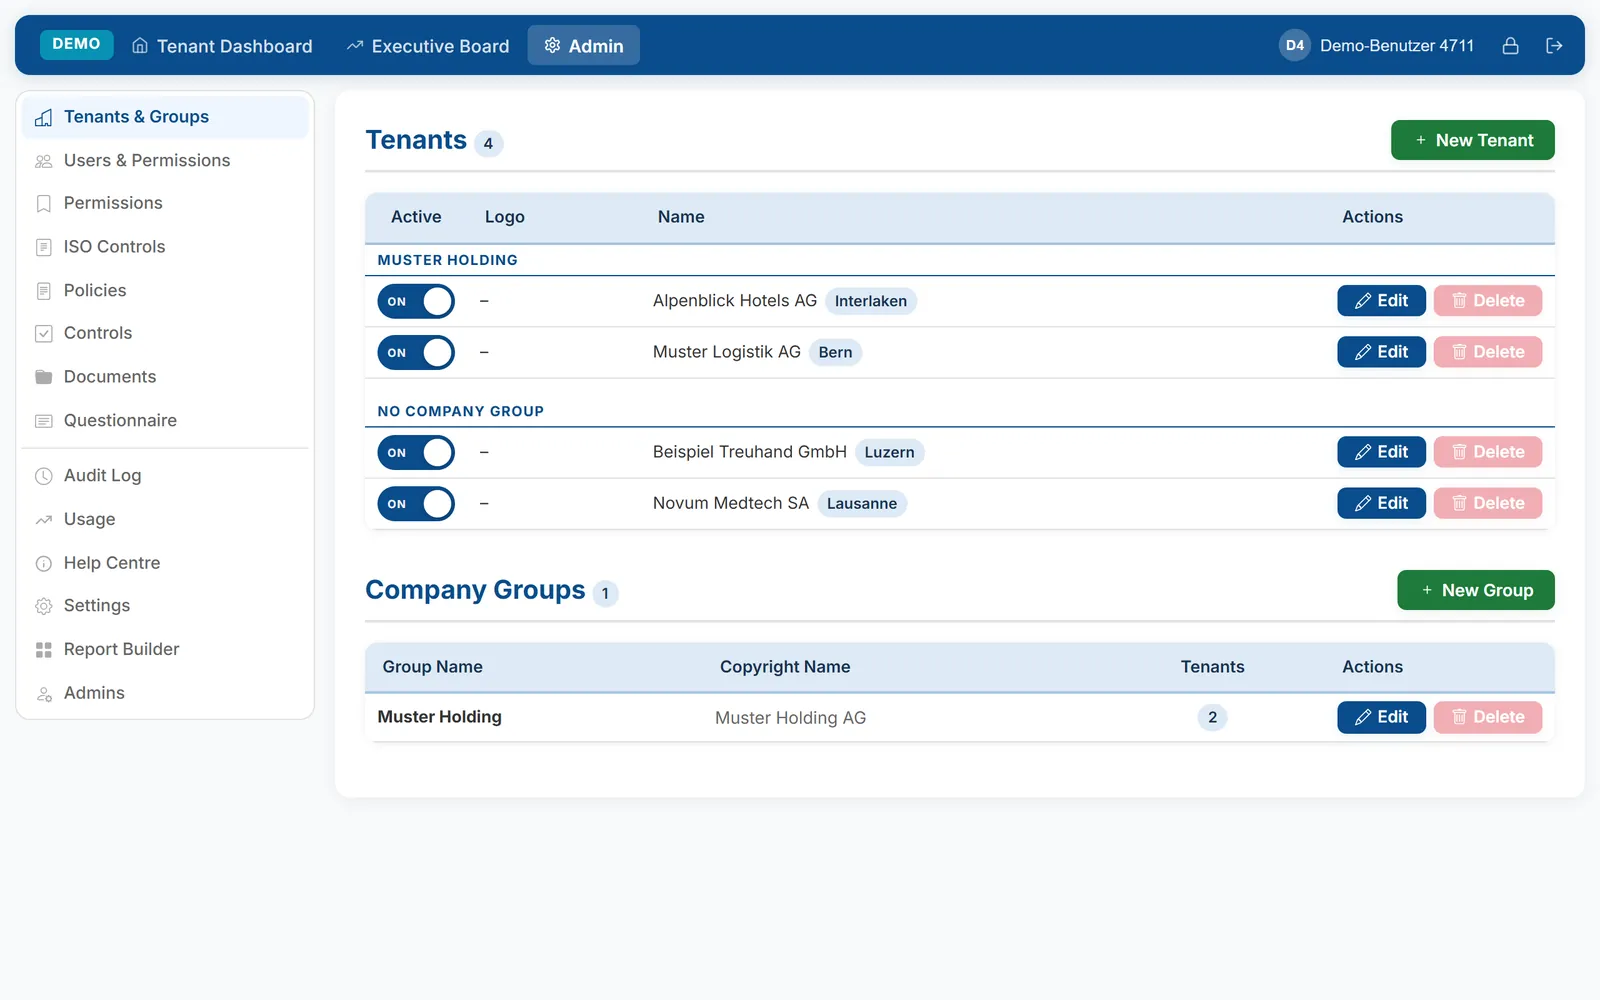
Create tenants
Admin › Tenants & Groups › “New Tenant”: one tenant per company, business unit or client, with logo and location. Company groups bundle several tenants on the dashboard. The number of tenants depends on your licence or subscription.
-
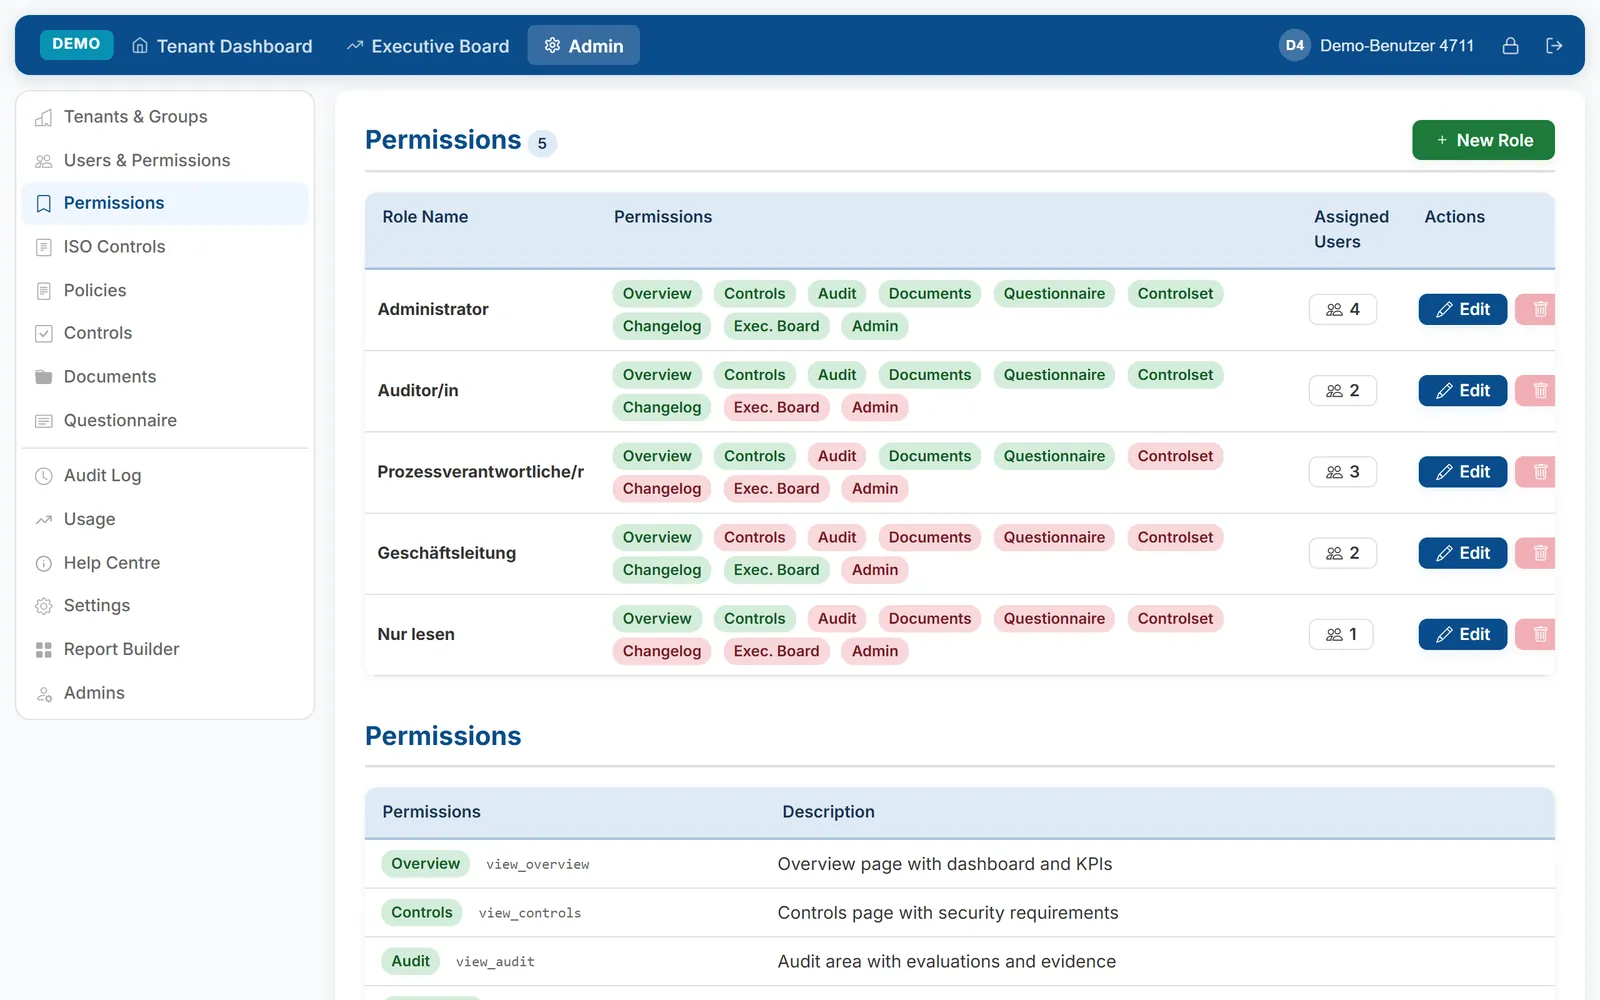
Define roles
Admin › Permissions › “New Role”: a role defines which areas may be viewed or edited – overview, controls, audit, documents, questionnaire, control set, change log, executive board, admin. Typical roles: administrator, auditor, process owner, management, read-only.
-
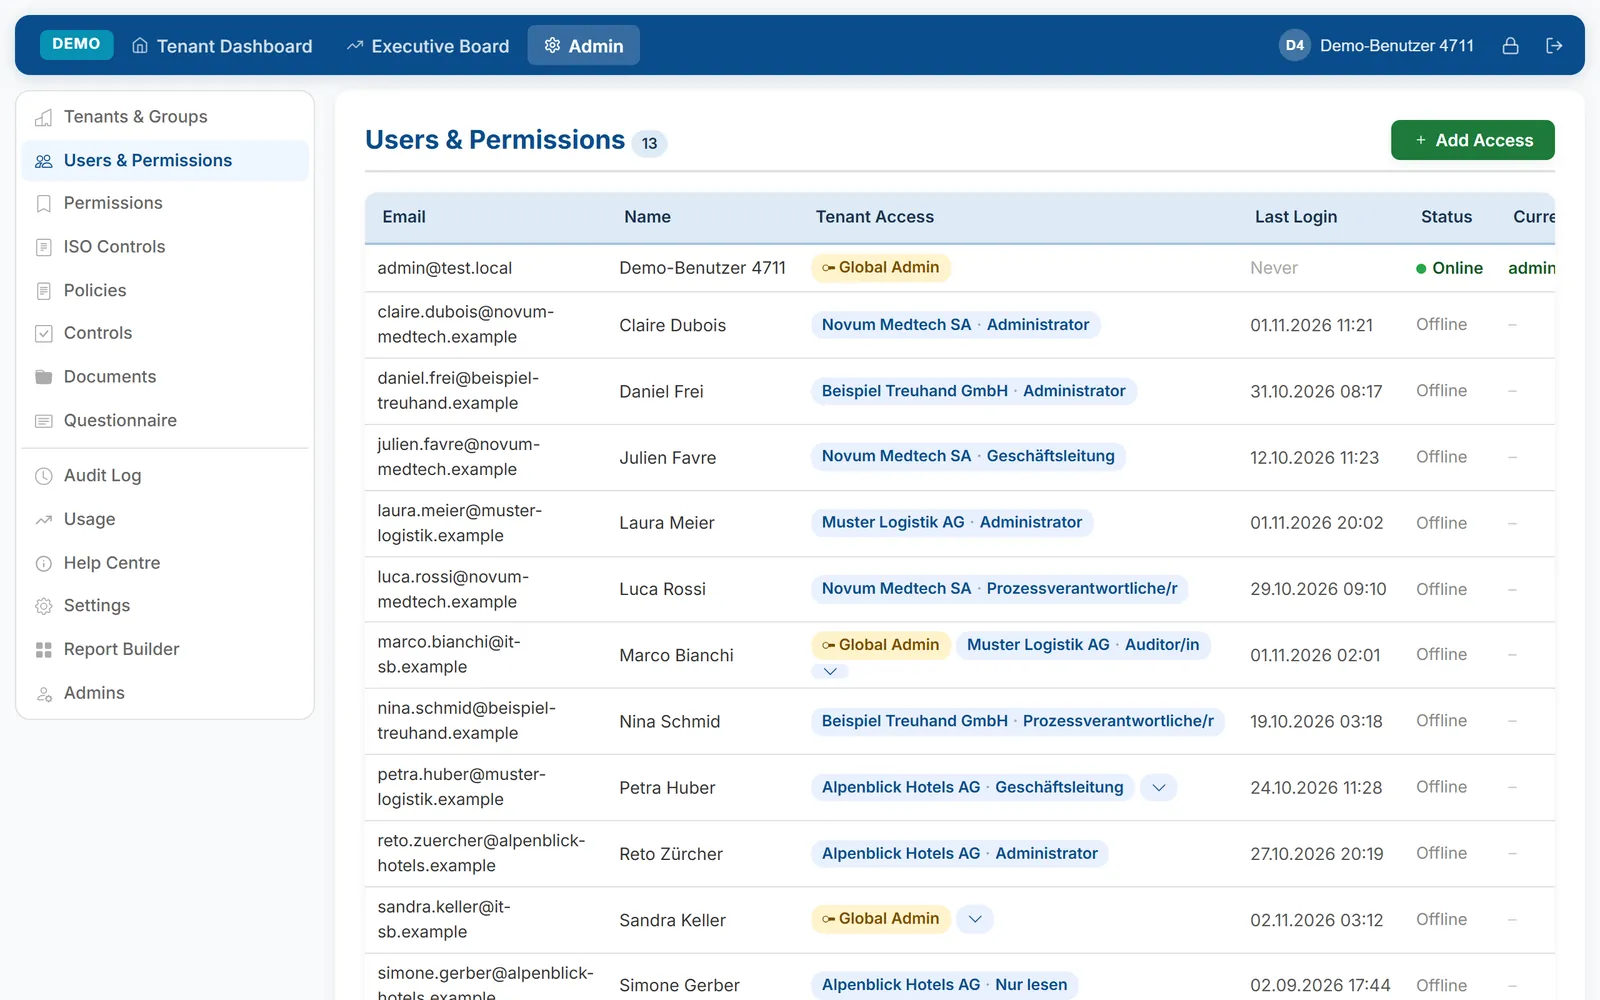
Add users
Admin › Users & Permissions › “Add Access”: give a person access to one or more tenants with a role, or make them a global admin. The list shows tenant access, last sign-in and status.
-
Controls and control set
The catalogue (e.g. IKT minimum standard or ISO 27001) is loaded in the setup or under Admin › Import / Export; own frameworks come in as CSV in the same format. Under Control set you decide per tenant which controls apply; every control shows its policy, control objective, control text and the expected documentation.
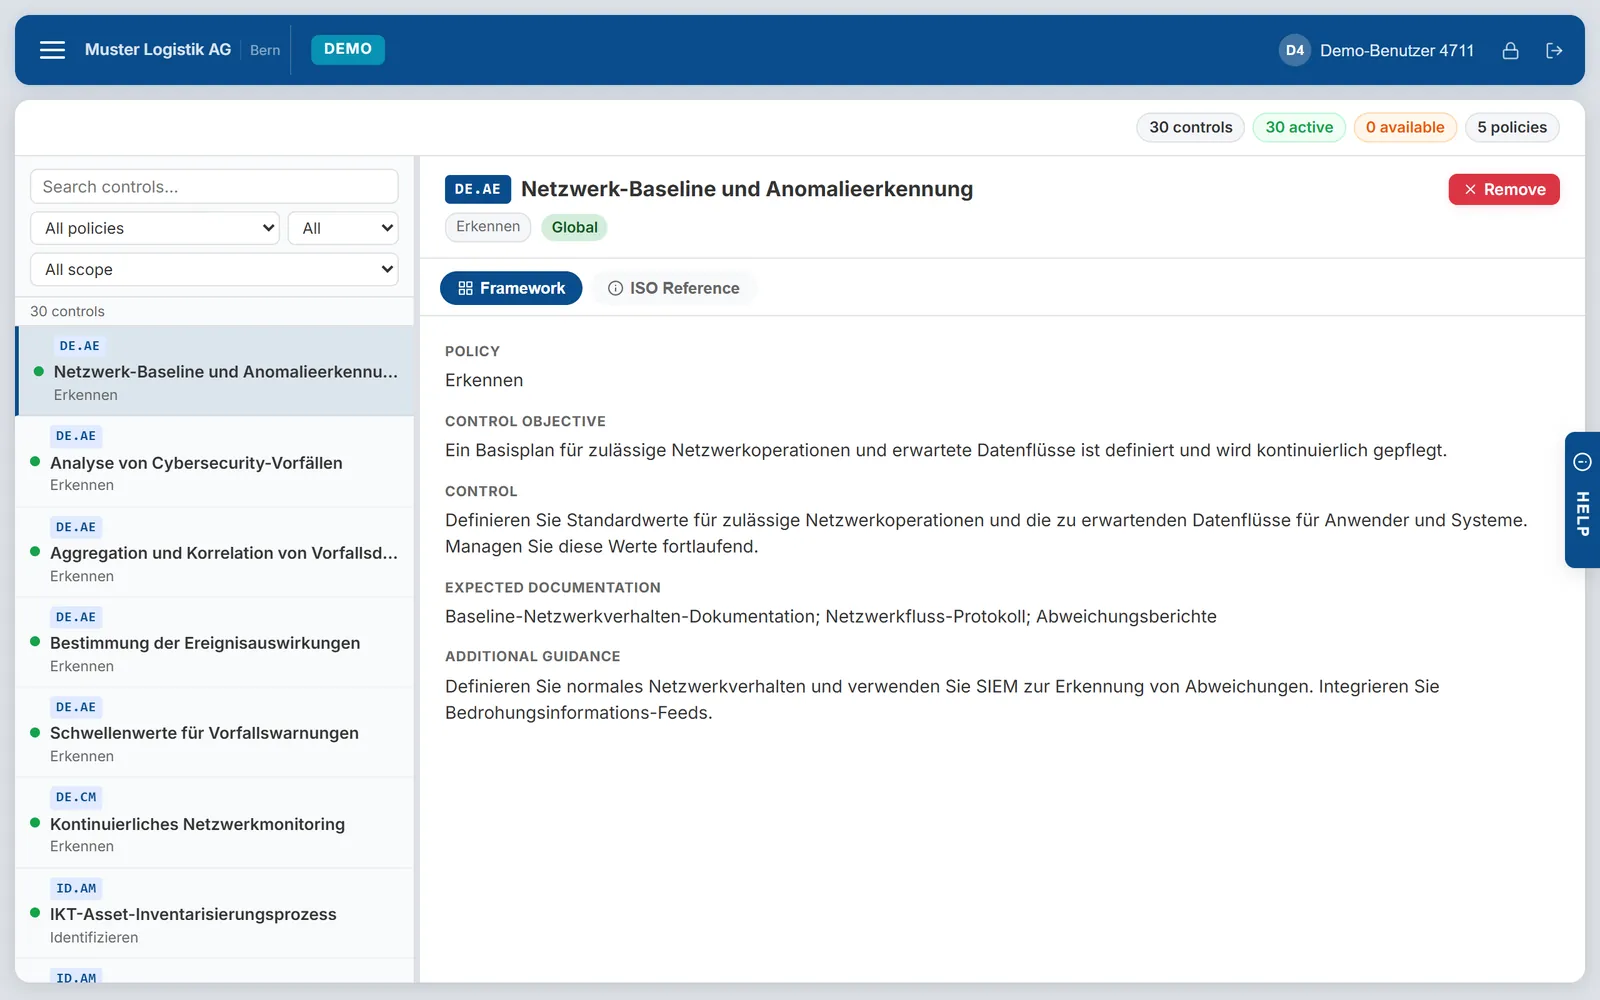
-
Carry out the audit
Under Audit you assess each control: status, test of design, risk, priority, effort, sample and test of effectiveness, findings in German and English. Evidence, documentation, ISO reference and requests are in tabs of the same view. Missing documents are requested as a data request with a delivery date – the audit dashboard lists open and overdue requests, sends reminders and lets you accept or reject what was delivered.
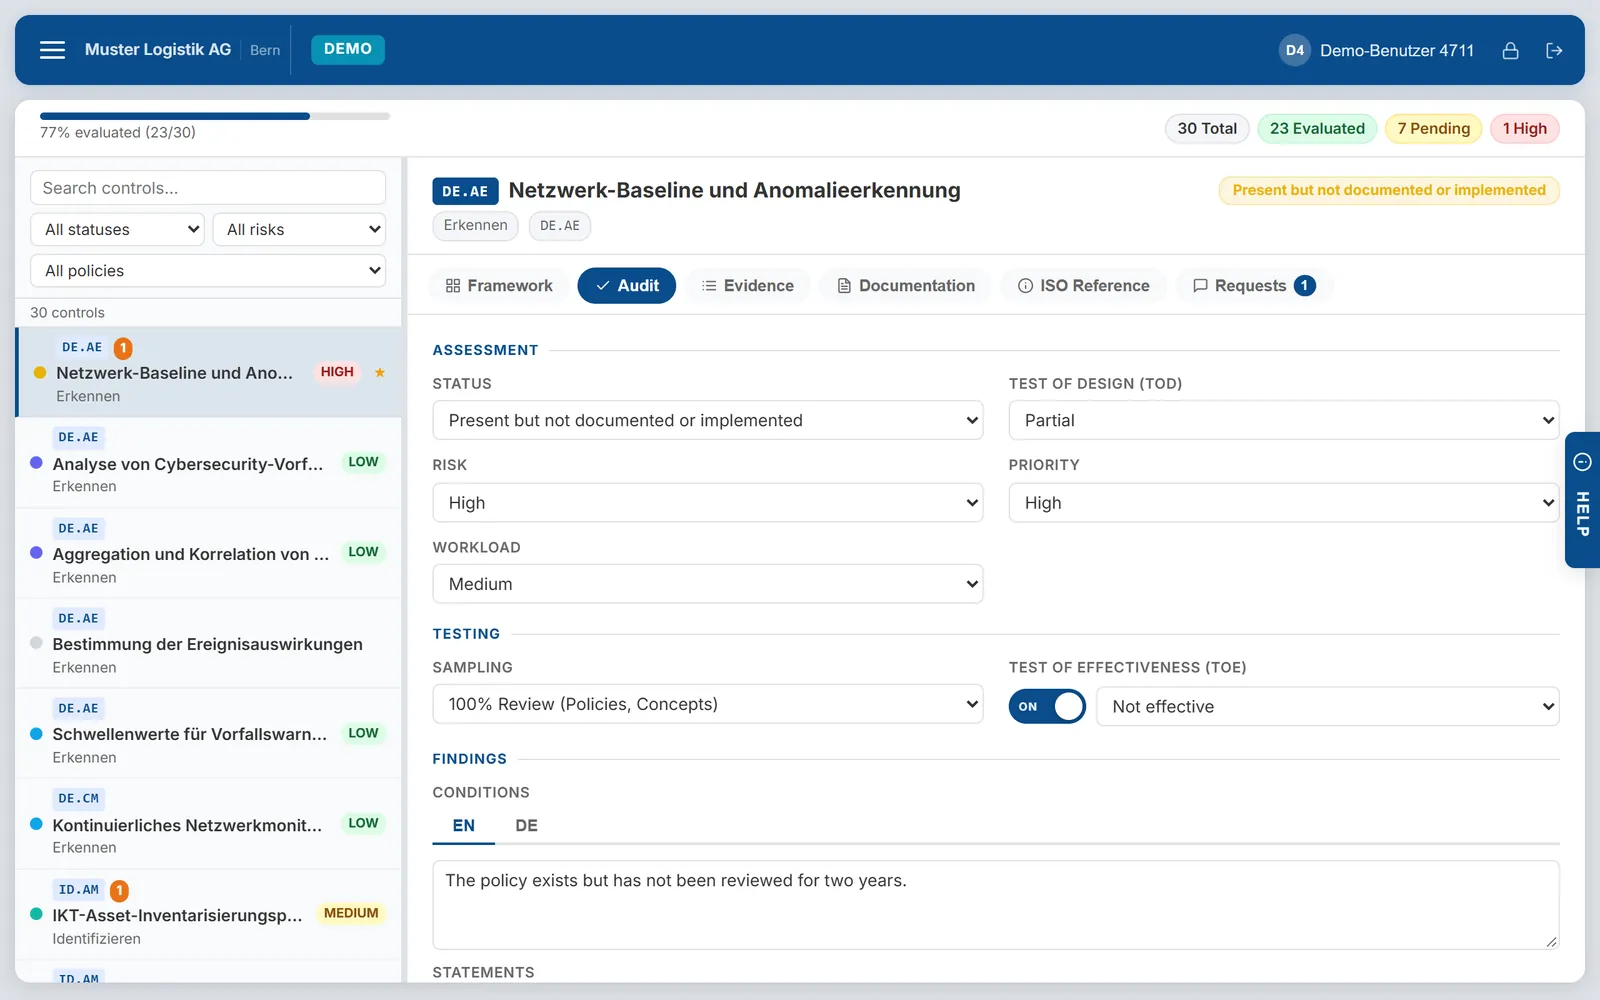
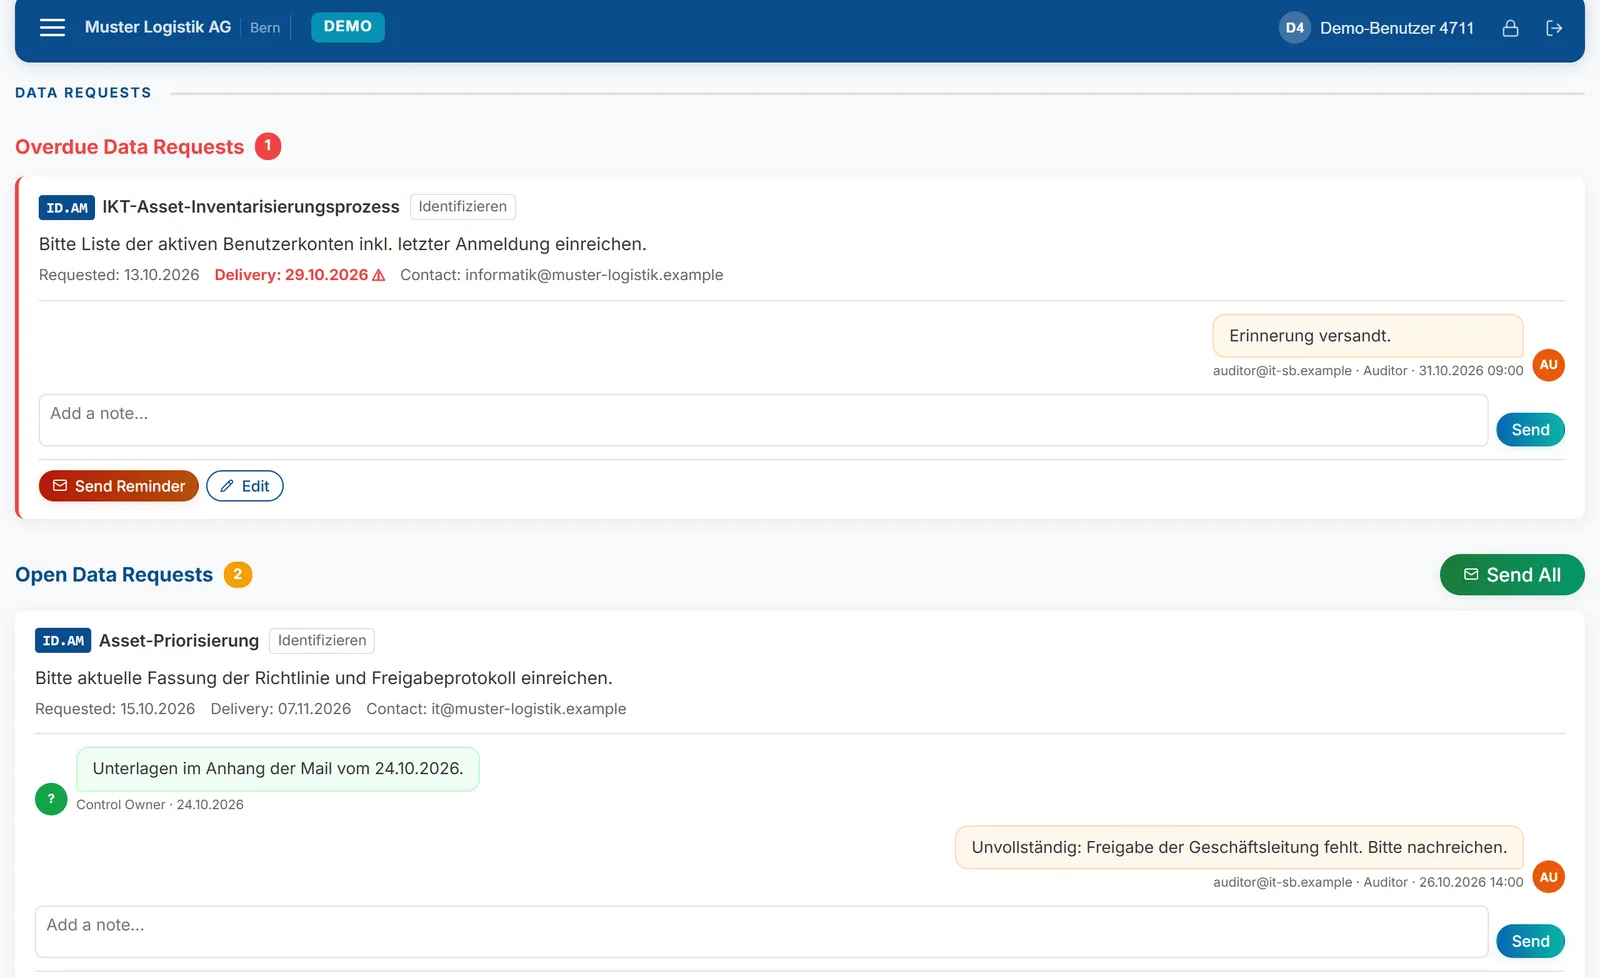
-
Report
On the audit dashboard, “Generate report” creates a PDF of the current audit status for the tenant, in German or English. With the Report Builder (Admin) you assemble your own reports from blocks – cover page, table of contents, achievement level chart, statement of applicability, accepted risks and more – and save them as templates. The Executive Board compares all tenants and is also available as PDF.
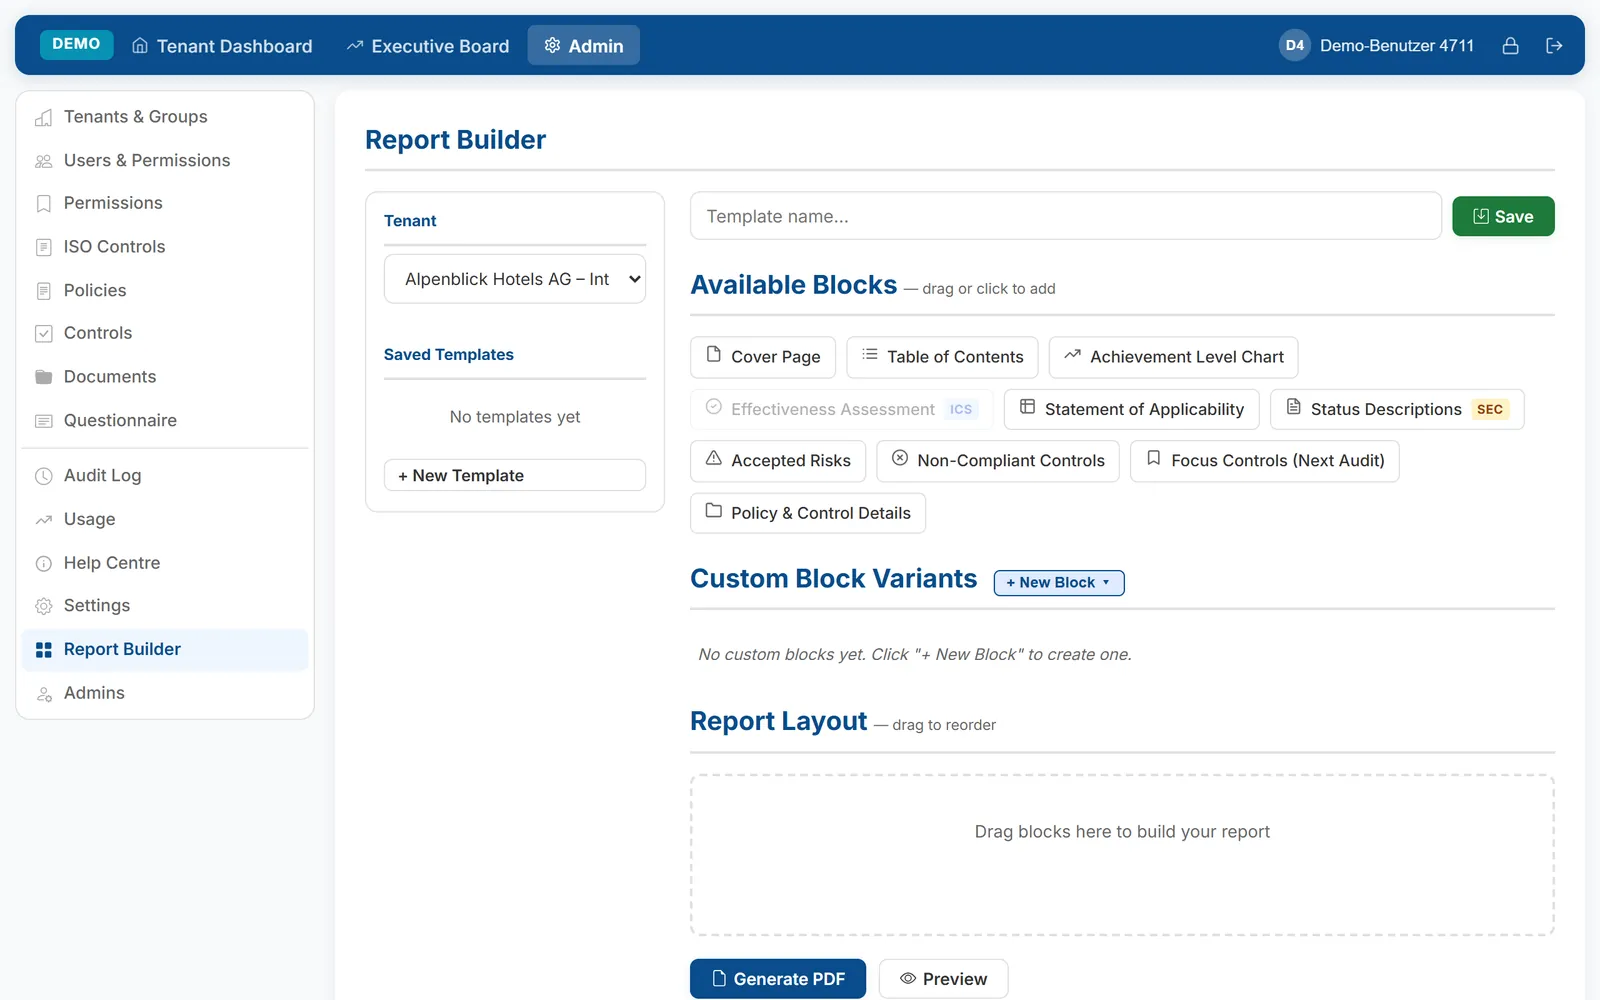
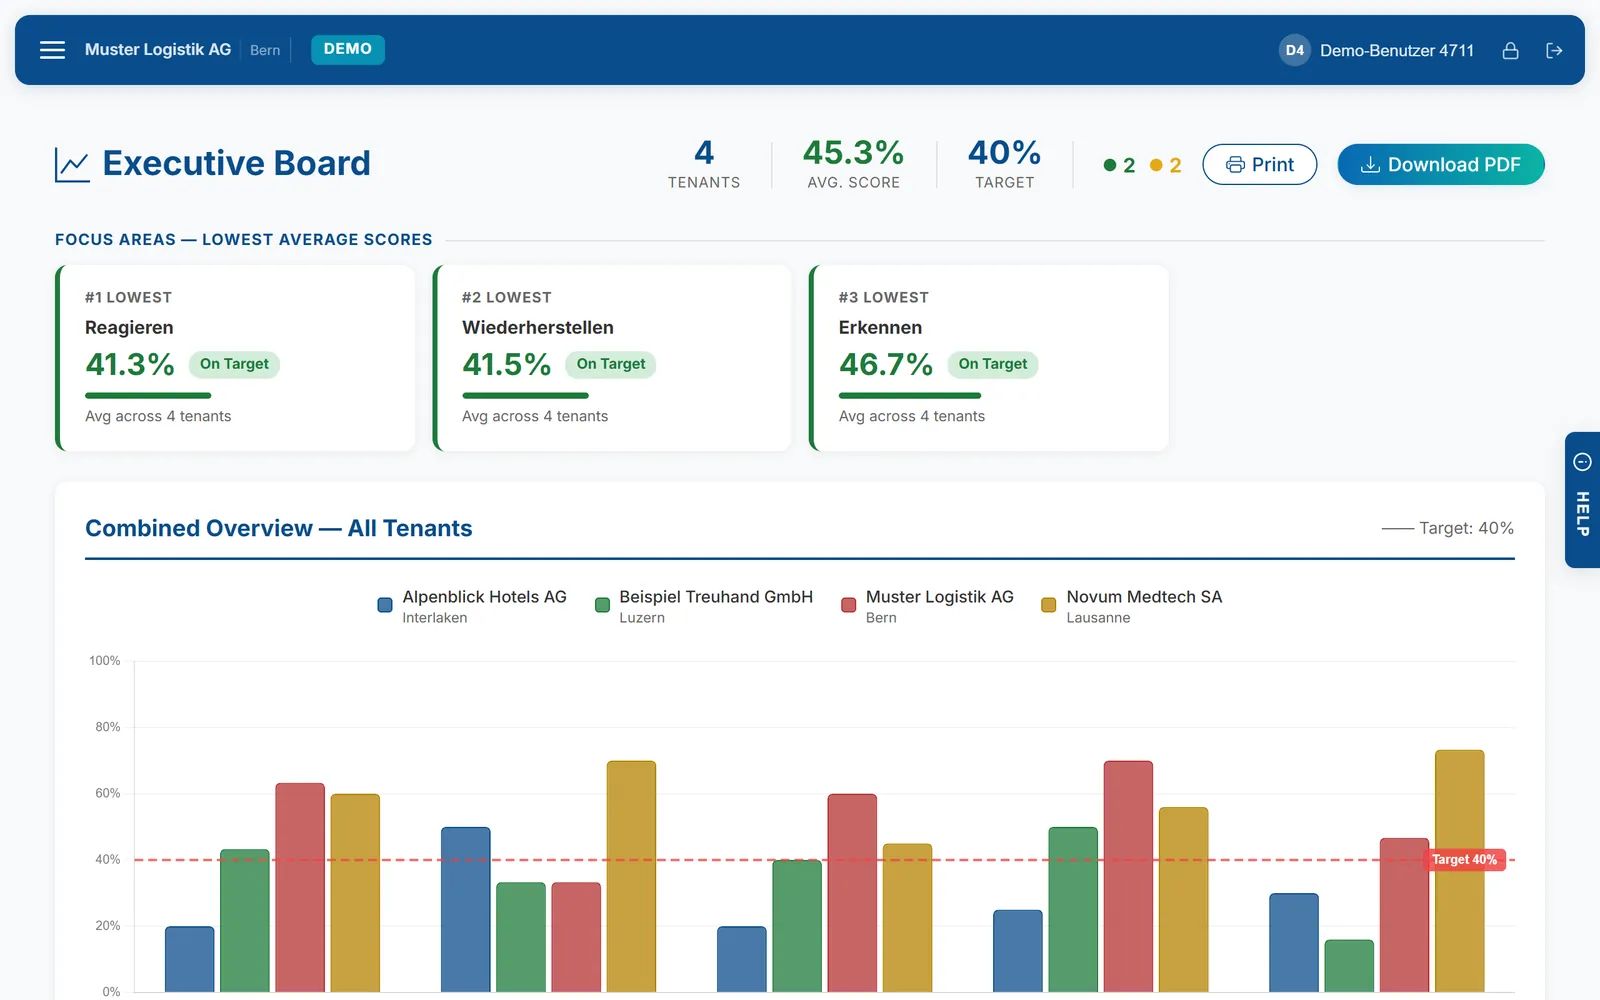
In Audhive, the Help tab at the right edge of every page explains the area you are in – including interactive tours.
Cloud subscription: after your order
-
Choose plan and address
Under Pricing choose the mode and monthly or yearly billing. On www.it-sb.ch you choose the address of your instance, e.g. yourcompany.audhive.io, add extra tenants or users if needed and pay via PayPal or by card.
-
Set-up e-mail
As soon as the payment is confirmed, your instance is set up automatically – with its own database. A few minutes later the welcome e-mail with your set-up link arrives. The link is valid for 72 hours; if it has expired, we send you a new one on request.
-
Password, second factor, first tenant
Via the link you set your password, set up an authenticator app (TOTP) or a passkey as the second factor and create the first tenant – then you are signed in and work directly in Audhive. Continue with the first steps.
-
Account and subscription
Global admins find Admin › Account and subscription: plan, status and paid-until date, cancel or resume, buy more tenants or users, and a time-limited support code if you want us to look at something. Updates and backups are our job; mail is sent centrally unless you enter your own mail access.
In operation (self-hosted)
- Licence: Audhive verifies the licence online every 7 days and keeps working for up to 30 days without a connection; after that it is read-only until the verification succeeds again. Status and “Verify now” under Admin › Settings › License.
- Updates: Admin › Update › “Check for updates” – signed packages, with a backup before installing.
- Moving to another server: “Release licence (move)” in the old installation, then install as described above and enter the key again (or restore a backup in step 3).
- More tenants or users: button “Buy tenants/users” under Admin › Settings › License, then “Verify now”. Details in the FAQ.